

Welcome to The Restful Stitch! Today we have a cozy, rest inspiring stitch to learn. The Alpine stitch is a gorgeous, textured crochet stitch that creates a rich, raised pattern that’s perfect for blankets, scarves, hats, and cozy home décor. While its intricate appearance might seem intimidating at first, it’s actually made using a simple combination of single crochet, double crochet and front post double crochet stitches.
In this tutorial, I’ll guide you through the Alpine stitch step by step, breaking down each row so it’s easy to follow whether you’re trying it for the first time or brushing up on your skills. By the end, you’ll have the confidence to add this stunning, woven-looking texture to your own crochet projects.
Grab your yarn and hook, and let’s get started creating one of crochet’s most eye-catching stitch patterns!

You can see the Alpine stitch, including the front post double crochet being made here.
Rows 1-3 are our set up rows before we begin the pattern repeat.
Begin by chaining any odd number. For this tutorial I am chaining 21.
Instead of the beginning chain and row 1 you can foundation single crochet an even number.
Sc in second ch from hook and each ch across.
You should now have an even number of sts.

Ch3, turn. The ch3 counts as the first dc so you will skip the first st. Dc in the next st and each st across.

Ch1 (does not count as stitch), turn. Sc in each st across. You will work the last sc in the top of the turning ch3.
If you are changing colors, finish the last sc with the new color.

Repeat row 4-7 until your project is the desired length.
Ch2, turn. (Ch2 always counts as stitch so skip the first st.) *Fpdc in the corresponding dc of row 2, dc in next st of row 3. Repeat from * across the row. Dc in the last st.
To clarify, you will work a fpdc in every other dc of row 2 and there will be an unworked st in row 3, behind the fpdc. The row ends with 2 double crochets.


Ch1, turn. Work a sc in each st across. Don’t forget the turning ch2. If you are changing colors, finish the last sc with the new color.


Ch2 (counts as first dc), turn. Dc in next st, *fpdc in next st of row 4 (between the fpdc of row 4), dc in next st. Repeat from * across the row.

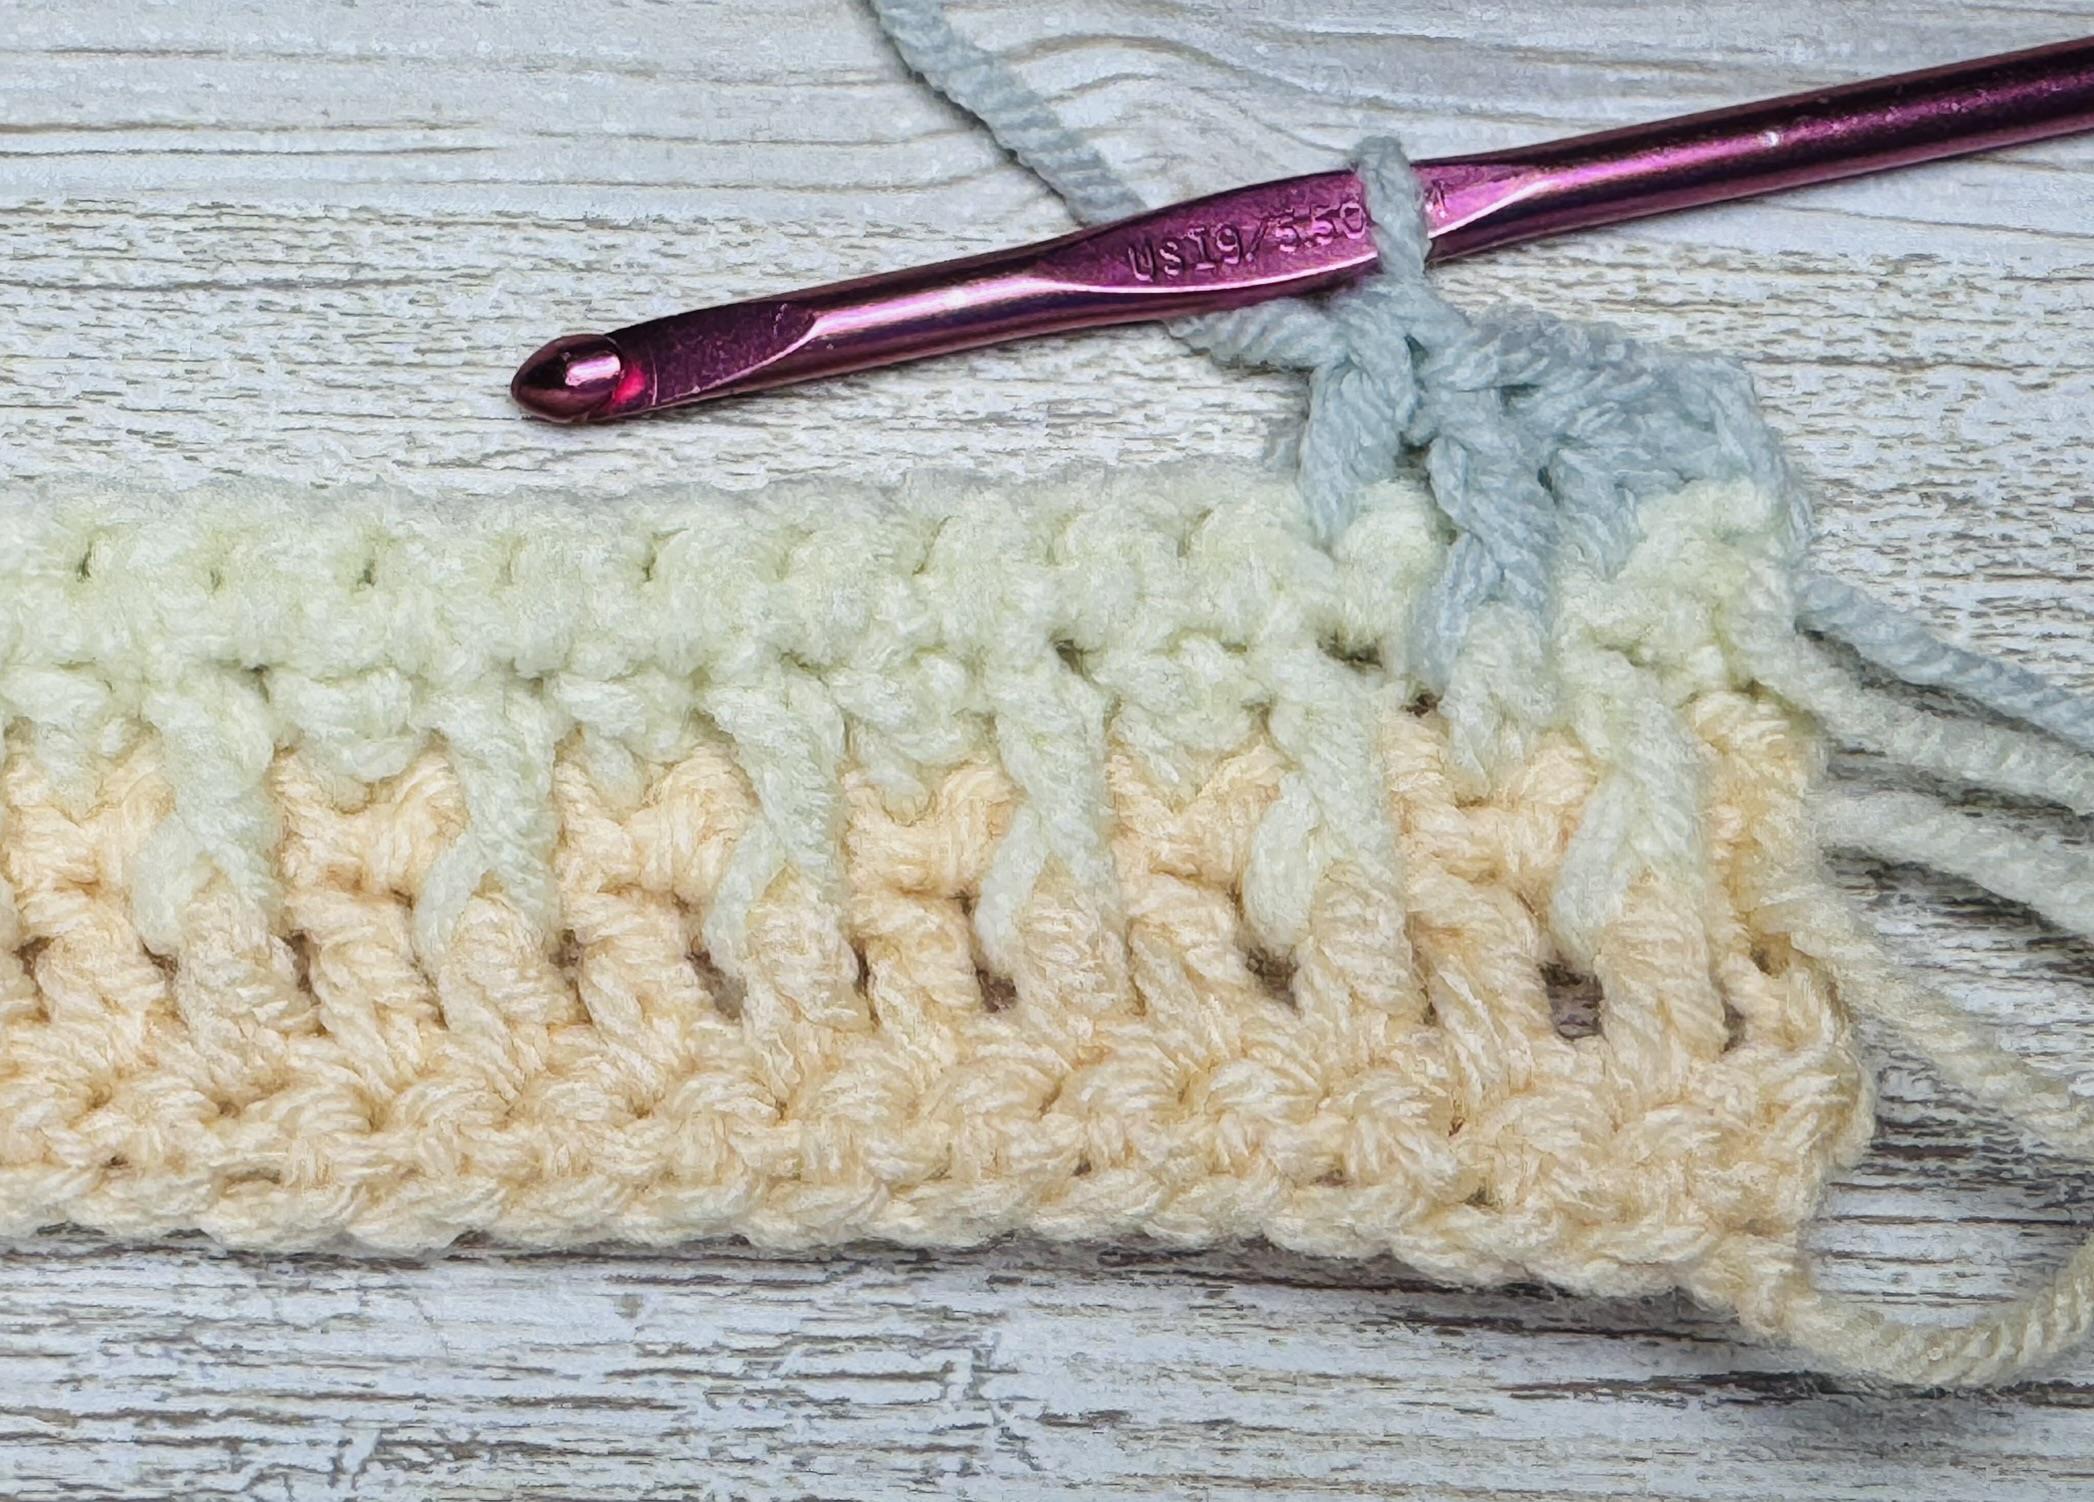
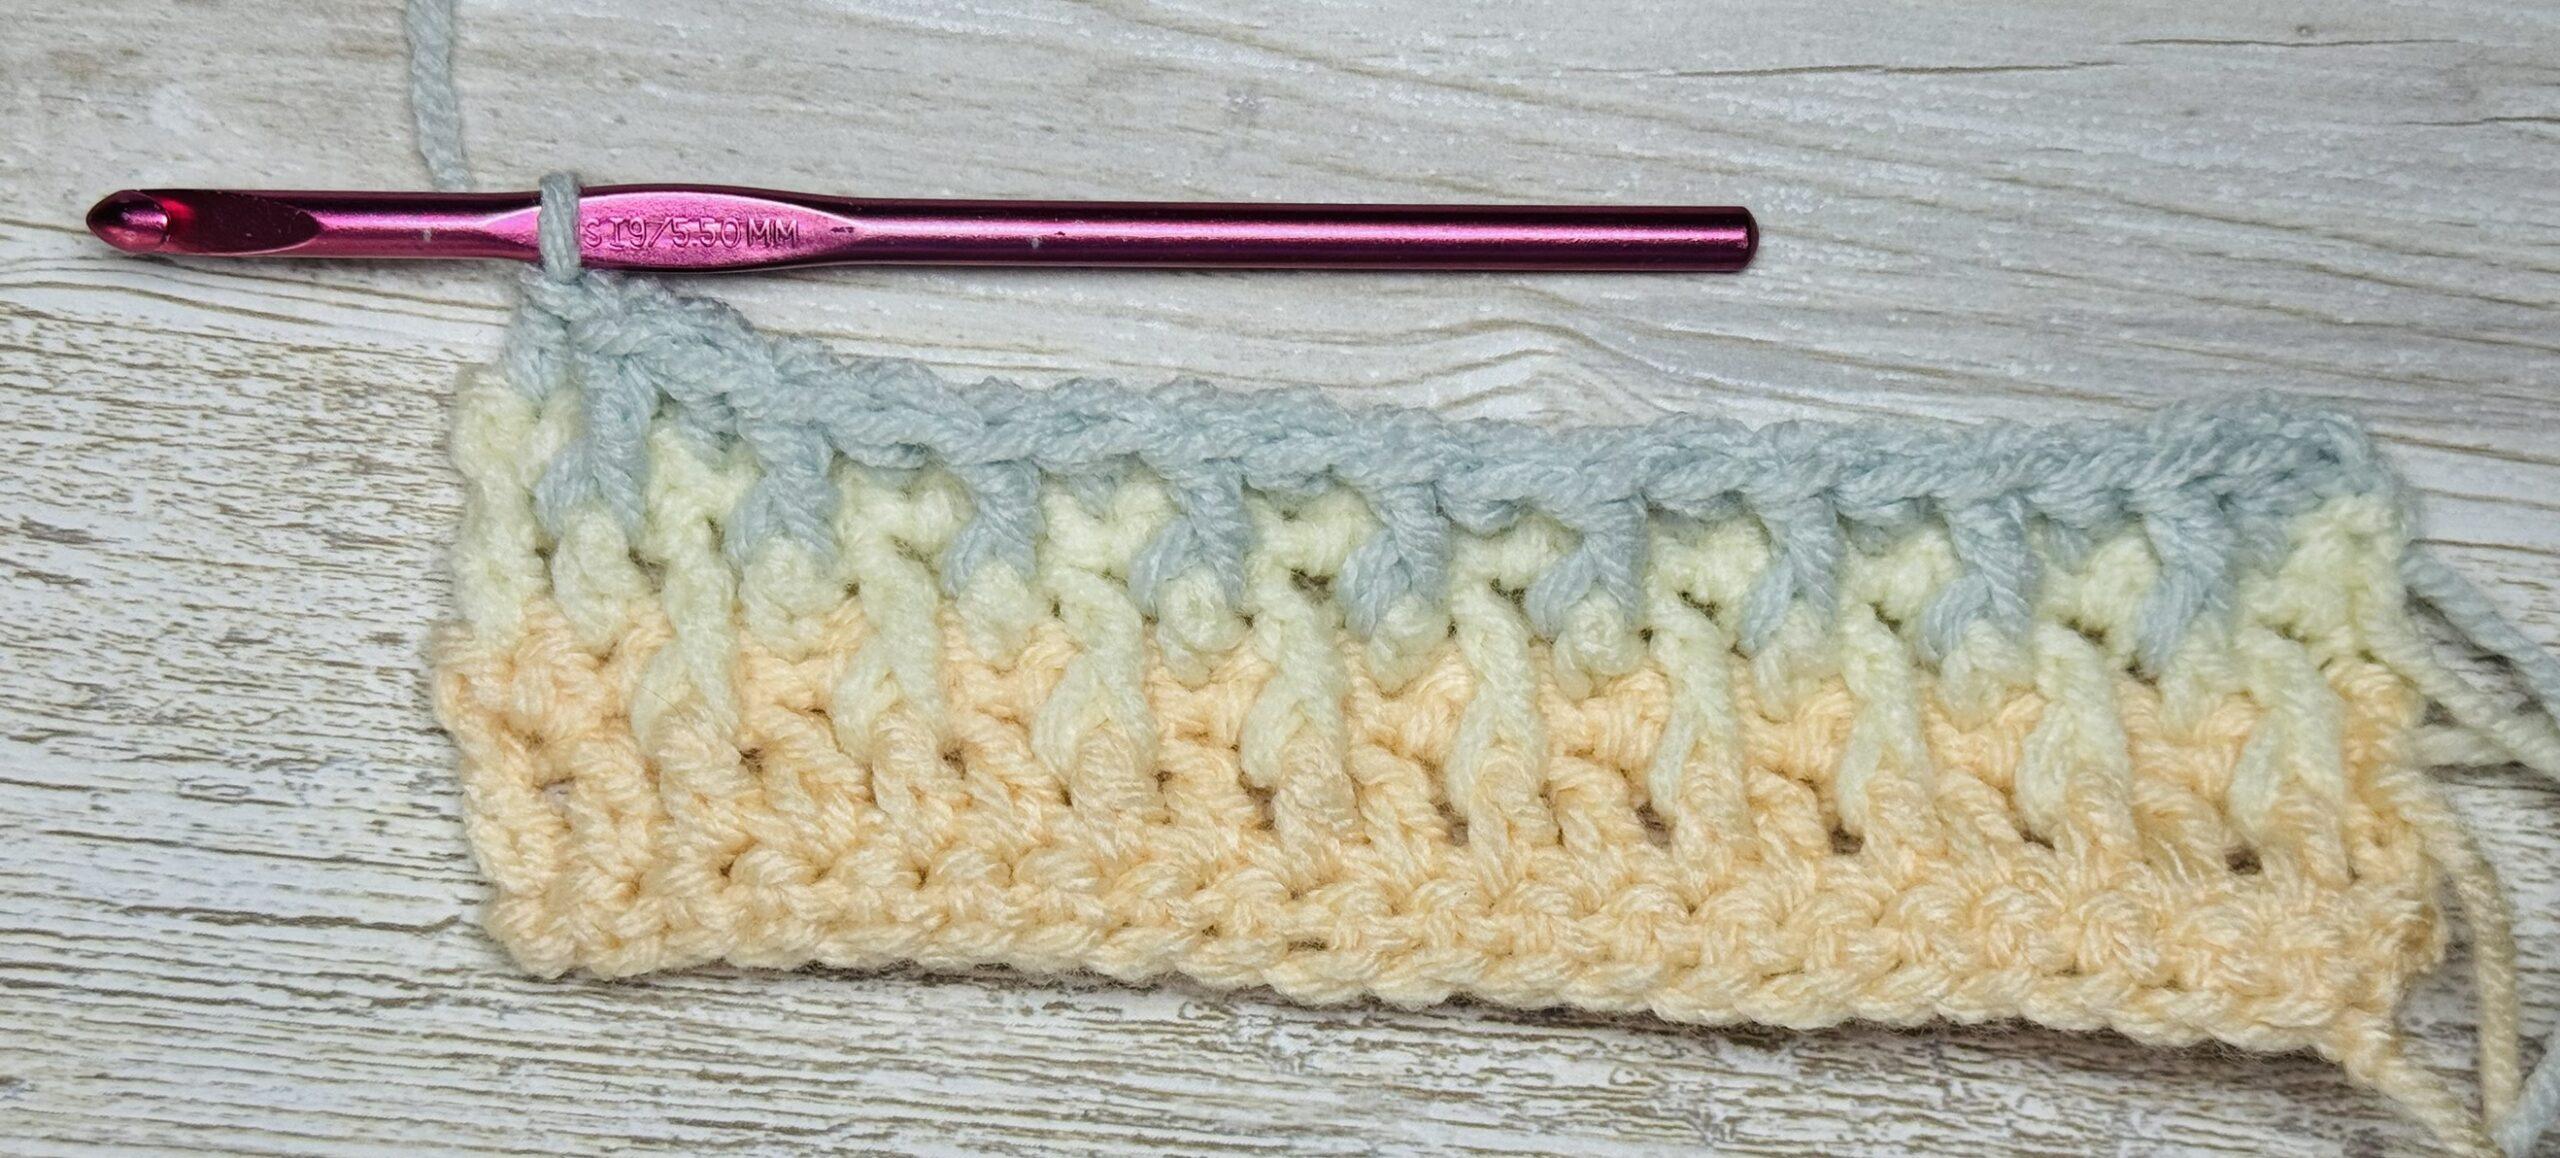
Repeat row 5.


Continue working rows 4-7 until your project reaches the desired length.

I hope you’ve enjoyed this tutorial and that is was useful to your creative endeavors. Please share what you make with the Alpine Stitch in the comments below. You can also find me on instagram and Facebook!
My name is Heather and I have been crocheting for over 20 years and making up my own patterns for almost as long. As a home school mother, heavily influenced by Charlotte Mason, I have a passion for mother culture – that is the continued self education of mothers. Through learning useful skills, creating art and reading great literature, all who so desire can continue to grow in wisdom and virtue. I believe that for mothers this is especially important as an example to our children and for the nourishing of our souls.
Through these free crochet tutorials and free crochet patterns I hope to share the joy and rest that I find in this art. In this space I pray to form a community of like minded woman, who are inspired to live up to their potential as whole people formed in the image of a wise, creative and good God.
-Heather
Subscribe to get the latest posts sent to your email.

